Table of Contents
The 3D Preview
To access the 3d preview window, click the Show/Hide 3D Preview Window button which is located in the General group within the Main Tab. From here you can set up the way in which you preview your results within Knald.
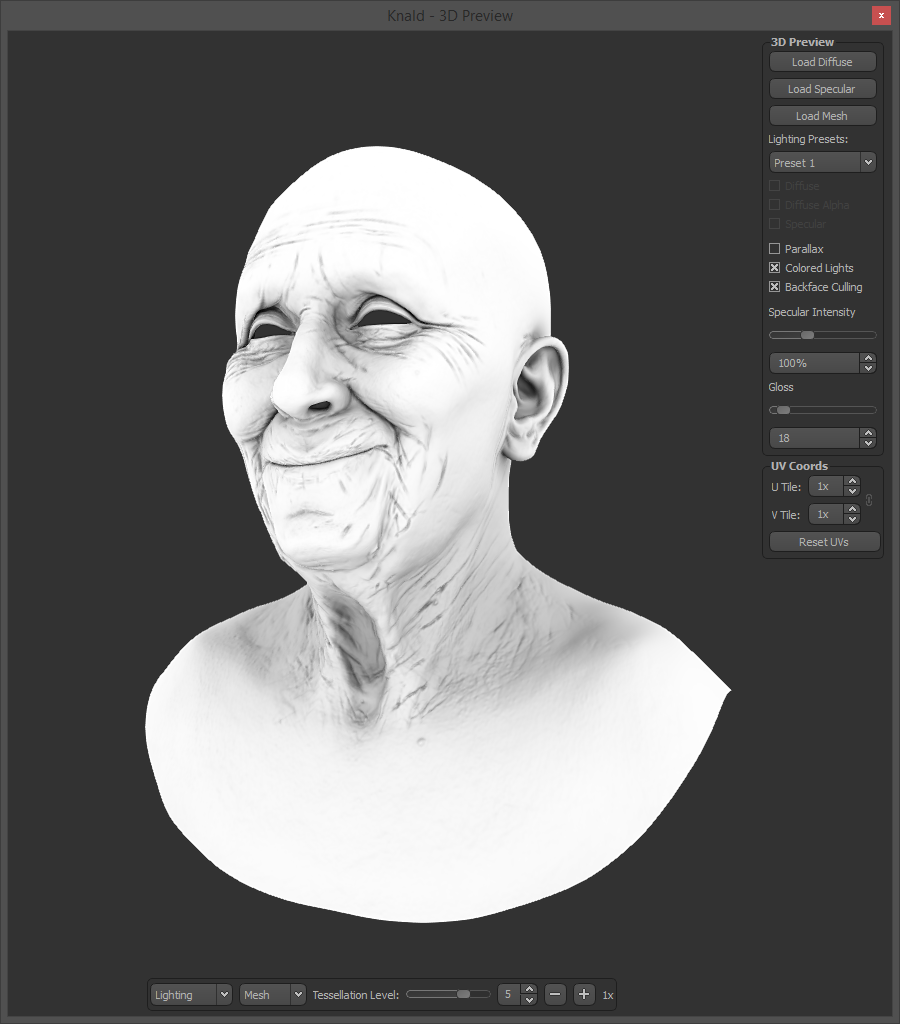
3D Preview Settings
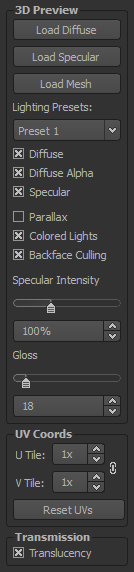
Load Diffuse: This button allows you to import a Diffuse texture that can be viewed on the primitives or imported meshes within the 3d preview window.
Load Specular: This button allows you to import a Specular texture that can be used to control the strength of the Specular highlights on the primitives or imported meshes within the 3d preview window.
Load Obj: This button allow you to import an .obj mesh into the 3d preview window.
Lighting Presets: This drop down menu allows you to choose between various lighting configurations, with which to better view your results. There are 4 presets to choose from.
Diffuse: This toggles the display of an imported Diffuse texture on/off.
Diffuse: This toggles the display of alpha transparency on/off. The alpha channel in the Diffuse texture is used to store the transparency mask.
Specular: This toggles the display of an imported Specular texture on/off.
Parallax: This toggles the Parallax effect on/off.
Colored Lights: This toggles colored lights on/off.
Backface Culling: Enables or disables backface culling in the 3d viewport.
Specular Intensity: This controls the global strength of the specular highlights shown on the meshes within the 3d preview window.
Gloss: This controls the global width of the specular highlights shown on the meshes within the 3d preview window.
U & V Tile: Here you can change the tiling shown on the objects within the 3d preview window in the U & V directions independently of the main UV Tile functionality. Changing the value will increase or decrease the number of times that the texture is tilled along the surface of the object.
Reset UVs: This button resets any changes you have made in regards to offsetting or tiling the UVs within the 3d preview window.
Translucency: This toggles translucency on/off.
3D Preview Controls

View Type: This dropdown menu controls what is displayed on the primitive or imported mesh within the 3d preview window.
There are 8 options to choose from:
- Lighting - This shows the fully lit primitive or mesh with any textures that you currently have imported.
- Height Map - A preview of the generated Height map.
- Ambient Occlusion - A preview of the generated Convexity map.
- Concavity - A preview of the generated Convexity map.
- Convexity - A preview of the generated Convexity map.
- Normal - A preview of the generated Normal map.
- Derivative - A preview of the generated Derivative map.
- Transmission - A preview of the generated Transmission map. Transmission is only available after it has been generated.
Object Type: This dropdown menu controls the type of object that you wish to use to preview your results within Knald. There are 4 options to choose from.
- Cylinder - A basic Cylinder primitive.
- Sphere - A basic Sphere primitive.
- Plane - A basic Plane primitive.
- Mesh - An imported .obj or .fbx mesh of your choosing.
Tessellation Level: This slider controls the amount of tessellation shown on the objects. Tessellation is based upon the ratio of 1 polygon per pixel at level 7, with the polygon count reducing by 25% as each level on the slider is also reduced.
A 2048² texture contains 4194304 pixels and as such the number of polygons use in level 7 during tessellation would be 4194304 when using a plane.If the slider is set to level 6, the new tessellated polygon count on that plane would be 3145728.
The following levels of tessellation for each level, based upon a 2048² texture as shown on a plane, is as follows:
- Level 7 = 4194304 polygons.
- Level 6 = 3145728 polygons.
- Level 5 = 2359296 polygons.
- Level 4 = 1769472 polygons.
- Level 3 = 1327104 polygons.
- Level 2 = 995328 polygons.
- Level 1 = 746496 polygons.
- Level 0 = 559872 polygons.
UV Tiling: Here you can change the tiling shown on the objects within the 3d preview window. Pressing the +/- buttons that are located on the numpad will increase and decrease the UV tiling on the primitives/meshes.
Holding CTRL or Alt in addition to +/- on the numpad will offset the UVs in the U & V direction respectively.